Tuesday, November 4, 2014

Fall Fox and Owl nails and Operation: Reduce the Effing Bead Stash

Foxes (duh) and owls are some of my favorite animals and I thought they'd make a cute fall themed manicure this week.  I'm pretty happy with the way they turned out!  I keep admiring them, which I don't always do with my nail art.  

I used the most variety of tools in this manicure: brushes, dotting tools, and markers.  I need to play with a larger variety of brushes with smaller bristles than a striper brush to see what I can get with them, but I finally feel as if I have a good handle on the tools and technique.  

Supplies:
Base coat
Nail colors:  I'm using an antique gold, metallic red-orange,metallic orange, metallic brown, black, and white.
Top coat
Dotting tools: Large and small diameter
angled nail art brush (a sacrificial eyeliner brush would work in a pinch)
nail art pen (or sharpie)

Monday, October 27, 2014

Y U No Write???

Between the new hours at work and the depression that's been creeping up on me slowly, I'm feeling a little lost.  I'm struggling to do things that I normally do, and I'm terrified of becoming suicidal again.  I feel that urge to pay for my sins with pain and blood, and I know that's... extreme.  
Instead, I find myself slowly sinking under the waters of depression, choosing instead to slowly grind to a halt, finding any excuse to sleep when the day just seems like too much to deal with anymore.  I've been staring at my last project and just unable to get the urge to make it into something cool.  I can't think of much that I want to do.

The pain and fatigue from Fibromyalgia are good excuses.  "I'm too tired."  "I'm in pain." "I just want to rest."  It's true.  I am in pain.  I am tired.  I am not used to being up at 6 AM to be functional by 7:30 when my shift starts.   I'm working fewer days in my daycare, but I'm back working the morning shift.  I love watching the dogs play, the sunrises, the slowly warming day and retreating shadows in the yard.  It's so much fun playing with the dogs when they're chipper and eager to run.  Unfortunately, the pain starts at 9 and slowly gets worse as the day goes on.  Sometimes it's so bad all I can do is sob hysterically for a while when the feeling of carpet is too much for my feet, or when the pressure from an affectionate kitty head bump makes me scream. I end up spending a lot of time in recovery mode, which is code for sitting on the couch and not moving unless I have to.


"I'll do it later." is my go-to excuse to myself.  I make plans and tell myself that I Totally Won't Do What I Always Do because present me forgets that future me likes to procrastinate, too.

Last weekend, I painted my nails.  I didn't like the way they turned out, but it's about taking care of myself.  I could go through those motions without feeling overwhelmed, or (bonus!) moving.  I re-did them this weekend, and like this result much better.  I didn't use any sort of guide, so this is my own little Halloween design.

This weekend  Ben had his first cuddle party, which was a success.  I was there to be a cuddle assistant, plus support the Ben, and didn't feel like I could do what I really wanted, which is to find someone who would be willing to hold me while I curled up into a ball and cried.  I thought I needed to be ready to be supportive of anyone else there and I walled myself off and hung out on the couch, spending a little time cuddling with Ben, catching up with another Cuddle Buddy and just listening.  I felt better being around a whole bunch of kindhearted, open people for a few hours.

The next night, we played Forbidden Island with some friends of Ben's that I'd met briefly before.  We had a great time and it helped a little more.

I'm doing something today.  I'm not standing still, I'm moving forward.  The pain is overwhelming and it's breaking through the distractions I use to keep me from feeling it.  I just need to put one foot in front of the other and I'll get through this.  It's hard.  I don't want to, but I know I must because this dark place of mine only gets darker.

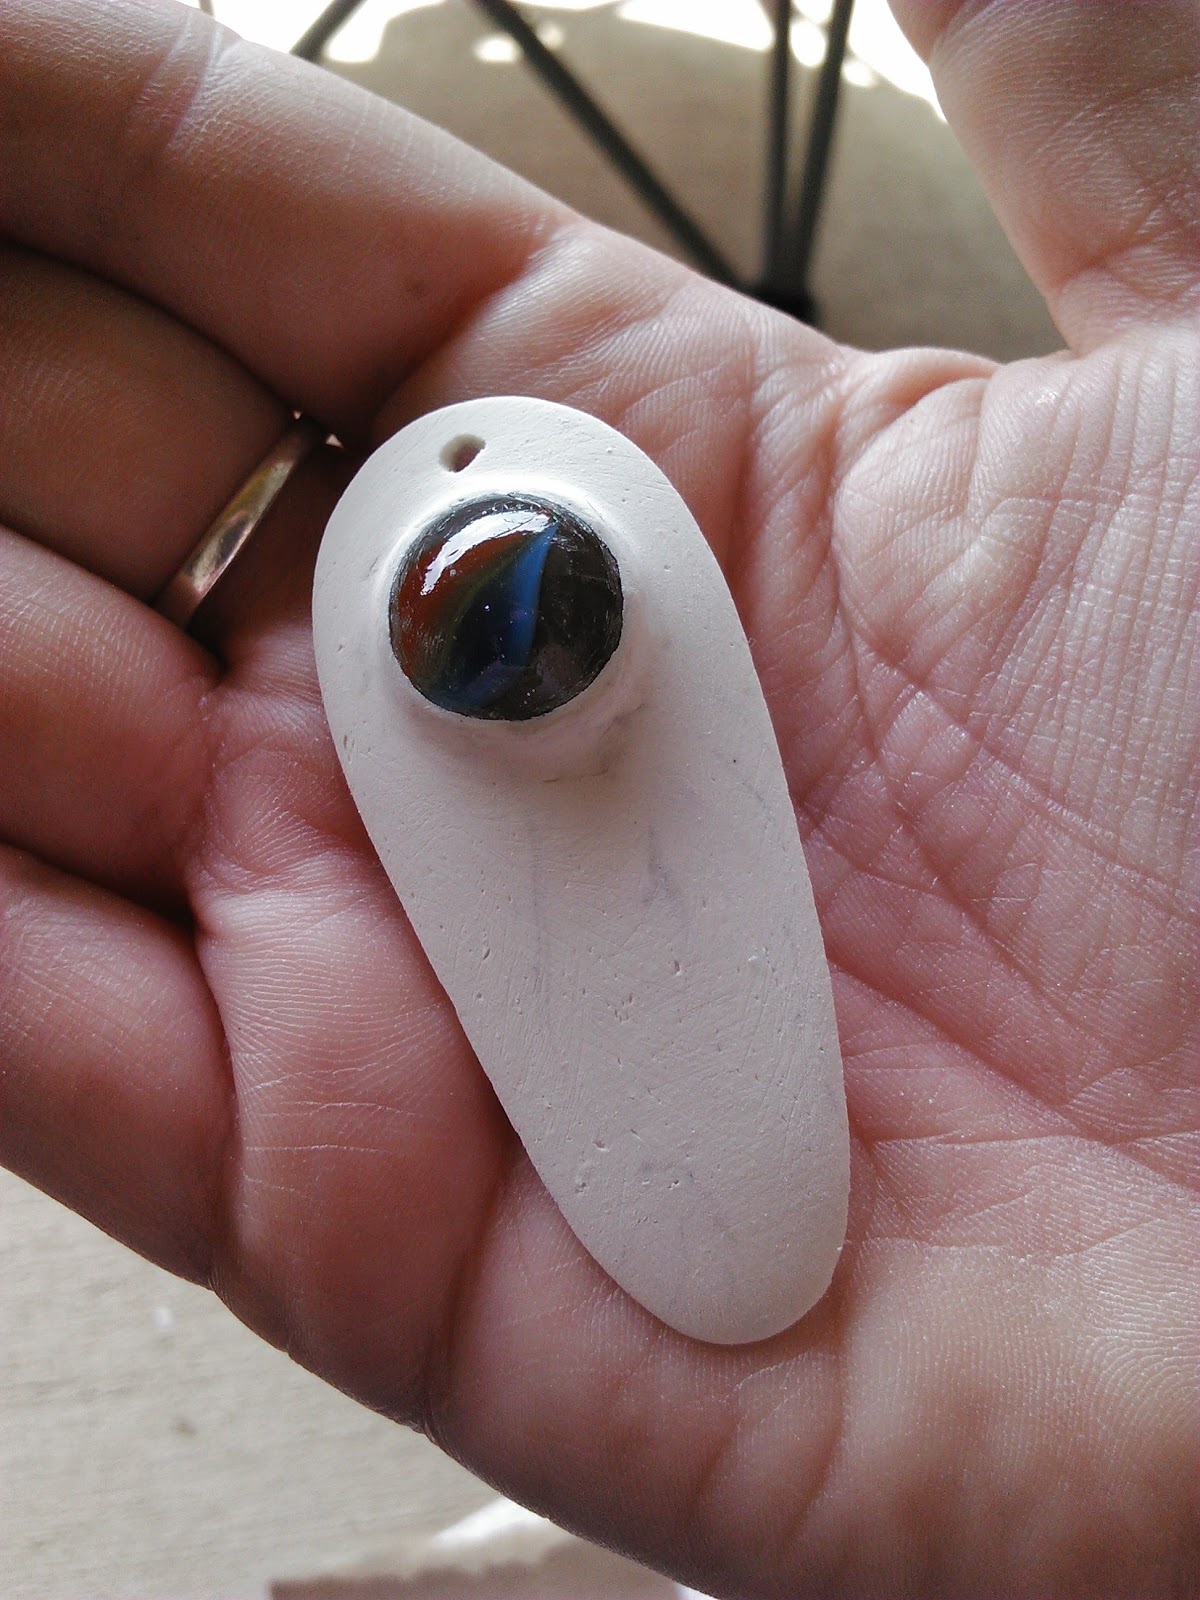
I did manage to get something done, though. The first necklace I made in time for a play that I went to with Ben to support a friend of ours who was on the cast.  I don't like it because I think it looks cheap.  The idea is interesting, but I don't know.  Maybe more beads so that it's like a collar?  The eye size is out of place?  This particular incarnation has a nasty tendency to flip at the sides.  That's probably because I put on the chain with a twist, but I couldn't figure out where it was.  I wanted to do something with more chain and less bead and while I like the idea, this one didn't pan out.

In a half-assed effort to feel in control of something, I went through my bead stash to see what I had.  Expect to see more beaded stuff as I begin Operation: Reduce the Effing Bead Stash.  I did find some beautiful purple, blue, and silver beads that I thought would be really cool in a necklace.  I had 3 shapes: oval, round, and a square-ish shape.  I used the two squatter beads in the spiral rope with cobalt, clear, and silver beads.  I think this one looks much better.  There's a better proportion of beads and eye, I think.  

There will be more stuff.  I'm not giving up yet.

Tuesday, October 7, 2014

Dragon Eye Sculpture and painting tutorial

I ran across Klaire De Lys and her makeup artistry some time ago on  YouTube.  She's a remarkable artist from England who does a lot of fantasy and horror transformations in makeup that are really cool.  Back in 2013, she did a dragon eye jar out of terracotta clay that was glued onto a glass jar.  I loved the scale technique and wanted to do a wearable piece.  I also wanted to play around with doing some sort of iridescent scale without the metallic paints because I don't have any on hand right now.

This is one of the resin cast and painted pieces.  The camera doesn't do it justice and I wasn't able to pick up the fine detail of the painting, which does look iridescent in the light.  I think they turned out great!  I know I'm turning the larger size into a necklace, but I'm still planning out how I want to do that.  The only things I'm sure about are there will be chains and beads, but beyond that, I'm a little stumped.  I'm thinking a short necklace, but it depends on whether or not this piece will overwhelm at that length.

This is a great October project.  The unblinking cats eye is a little creepy and perfect for this time of the year.  I want to wear this to work but I'm worried that the dogs that I work with won't be as excited about this piece as I am.

I can see it now. "Hey! It's Nice Daycare Lady!  She's up front and OH MY GOD WHAT IS THAT THING STARING AT ME ON YOUR CHEST??"  

There are both painted and unpainted versions of the eye available for sale.

Sculpting the eye

Monday, September 29, 2014

FenCon Report and KItsune Fan

cutestpaw.com
I am exhausted.  It's been a long week and a very busy weekend, but it's been a great one.  I had fun at FenCon, and I did much better than I thought I might in the art show.  Now that it's over, I've got a ton of things to do but I'm excited to realize a dream I abandoned in my twenties.

I sat in on a couple of very interesting panels by costumer Kathleen O'Brien.  I've seen her at several of the Texas and Oklahoma cons, and her work is beautiful.  I've enjoyed every panel I've seen her on, and this con didn't disappoint.  She had a class on the history of the bustle and brought examples from her vintage collection and it was fascinating!  I took her "construct your own bustle' make shop and sadly, we didn't have enough time to complete so I've still got a bunch of wire and an incomplete bustle... for now.  She gave us written instructions and pictures, so I've got enough to get myself started and just enough knowledge of construction to get me into a LOT of trouble.

I was Mom and John DeLaughter's Minion for some of the FenKids programming.  I was happy to help out even if I have no clue what I'm doing.  Mom had a dinoKids panel where we tried to put together a skeleton puzzle (we failed) and made "dino eggs" with a skeletal dinosaur in the middle.  John was making bridges out of marshmallows, pretzel sticks, graham crackers, and frosting which was somehow amusing and terrifying at the same time.  There were a LOT of kids happy about all the sugary sweets! (John's evil.  It's part of his charm!) I helped out where I could, assisting the younger kids with the dino eggs and kibitzing with the older ones building the bridges.  Doggy Daycare is a great way to get familiar with the controlled chaos of a room full of children, but I was still overwhelmed at times!  Fortunately, there were several people there and we managed to keep all of the children safe and (mostly) happy.

OMG! OMG! OMG! I Sold Stuff In The Art Show!!!!!

(actual text to a few friends)

I arrived Friday after my day job and was very anxious about setting up my first art show.  I felt so unprepared and had no clue what I was doing.  The FenCon Art Show staff was very helpful and got me on my way with all of the tags, procedures, and everything else I had no clue about.  I was very grateful for them!  It was a great art show, and I was intimidated by the quality of art in the show.  There were so many excellent artists!  Many of the artists sold at least a piece, and I'm so glad that it was a successful show.

via/karmiphuc.com

I was popular with the Whovians and all of my Dr. Who work sold out!  I am delighted to see them go and hope they bring their new owners much joy and compliments.  I still squee a little when I think about it.  I sold my artwork!  To strangers!

I create for my own joy and to find other people who enjoy it fills me with such pride.


Monday, September 22, 2014

You mean what is WHEN???

Mom was nice enough to remind me FenCon is next weekend.  She's got some art show space that she's sharing with me (because Mom's awesome like that) and I'm in full-on panic mode.  I don't feel like I have enough work, and the work that I do have is a little all over the place with a ballpoint pen drawing, found object sculpture, 3 necklaces, and a couple mini journals.  Worse yet, I can't keep elf ears in stock (terrible problem, I know) and I feel so incredibly unprepared.  I have this week to bang out another item or two, maybe another drawing, and do any preliminary drawings or research for the next major project, a dragon scale collar necklace.

I hate feeling unprepared.   I'm not always sure what the next step should be and instead of making a step and a mistake, I end up making another, sometimes bigger mistake and staying in one place.  I want to get more pieces out and instead, I get almost nothing done while I'm paralyzed with anxiety.  Fortunately, I'm doing better with it this time around and getting a little bit done instead of hyperventilating in the corner.

I got table coverings  and another necklace display, plus some boxes for the jewelry.  It's at least a start towards getting everything organized.  I know I have until Friday, but it just doesn't seem long enough with commissions and work and everything else that comes with breathing.  I'm taking things one at a time and I'll get through what I get through, even if it doesn't feel like enough.

The sculpture didn't turn out like I had in mind, but I still like it.  I like the repetition of the circular motif throughout the piece and I think that really ties the thing together.  It ended up having more of a steampunk vibe than I was expecting, despite the roses being the most steampunk thing on there.   I used screws as accents throughout the piece, the silver being a nice contrast to the rest of the gold and copper. 

I tried a couple of different things that didn't work out.  I wanted some vines that would act a little like wires connecting various parts to others.  Unfortunately, it looked messy and I hated it.  I tried making them into another repetitive loop shape to see if that would look better.  It looked worse.  I put a little bit of green nail polish on it, but nothing could save it, so I ended up removing all of them after wasting a few nights.

More creative uses for nail polish

I had a bit of green circuit board hanging out on the side of the piece that I hadn't decided what to do with.  I painted it with my favorite gold nail polish because it was what I had handy. I used a coppery red to paint a part of the hard drive to give it a little more interest and the center portion of the mirrored disk gold.  I used black and turquoise on the copper parts to age them, although in retrospect I should have chosen brown.  The black is a little harsh, but it works in the end.  I used a dry brush technique on all of the copper bits.  

I used nail polish on the roses too, because one of the other notions I had was drips going down or around the roses.  Instead I used a dark red and purple (the red was a little bloody) to accent the edges of the roses with the same dry brush technique.  I like how they ended up, with a little bit of color along the edges and on the tops of the inside petals.

I like it.  There is a circular motif that runs through the piece that I loved from the beginning.  The colors work (they're all neutrals, so.. duh.) and the mechanical vibe is neat.  Ben doesn't like it, and he's not entirely sure why.  Not everyone will like my work, or even every piece, but I'm worried that this one is a dud.  Abstract art can be a hard sell for many people, but I grew to love viewing and creating it in college.  There's something very liberating in throwing away the idea that your art has to represent something concrete instead of finding beauty in unusual places.

Here's what the finished sculpture looks like.  It's for sale, and it's debut will be at FenCon this weekend.  If you're in Dallas, stop by and get your nerd on!  

Monday, September 15, 2014

When life hands you scams... make art?

It all started when Ben got a video game stuck in his head.

A coworker was raving about the JRPG Ni No Kuni. It was developed by Level-5 and Studio Ghibli, the latter known as the compay who makes stunning animated movies about a plucky child who loses their parent and go on a magical adventure with cute monsters.  Ben found the game and looked for a good deal on a PS3.

There's yer problem
He found one that looked promising on Craigslist.  He met the seller and his father, deals were made, and he rushed home to set up his new toy.  We discovered pretty quickly that it wasn't working, left a couple of messages, and discovered that that our only option was civil court if we could track down the people.  We looked at reparing it.  Turns out, the kid who broke this tried to fix it as only a kid will, and there's no fixing that sort of damage.  When he realized this, he gutted the thing and sold it. 

We were both angry and I went for a walk.  I stopped cussing around 2.5 miles and by the time I got home, I was clear-headed enough to go over the budget with Ben and we bought a PS3 from a retailer.  

Now we had 2 PS3's and more money spent than I'd like.  I saved the junky PS3 and an Xbox that died in the back of the closet hoping that inspiration would hit.  

Monday, September 8, 2014

There and Back Again Book Purse, part 2: lining and final assembly


We left off last week with the finished purse handles and cover ready for assembly.  This week we'll be concentrating on the lining and putting the entire thing together.  Check out part 1 to see how I made the handles and designed the cover. I'm using the directions from Juliacy's Book Purse DIY video for most of the instructions here.  

Supplies:

approx .5 yards of fabric
poster board or light cardboard
ribbon
Duct tape
ribbon
needle and thread/sewing machine
Hot glue and glue sticks
Book purse handles
Painted book cover
Magnetic closure, filched from an old purse
Ruler 

Most of these materials I already had around.  Overall, I've spent less than 10.00 (US) on them.  

Pattern making

Now it's time to set the opening.  It needs to be wide enough to get a hand in there, but not so wide that stuff falls out of it when you are fishing for your keys.  I found about 6 inches (15 cm) should do the trick.  

I placed my book on my poster board and traced the shape of my book.  This wasn't as accurate as I
'd have liked.  In the future, I'll take the time to measure out and mark it out.  If the cardboard is thicker, score with the craft knife to make folding easier.  The cut mark will be on the outside.  

Make 2 trapezoid shapes and fold them in half.  Trim up so that they're symmetrical and set aside. 

Measure and cut a long rectangle to fit inside the spine.  

Sunday, August 31, 2014

There and Back Again Book Purse: Handles and painting the cover


Finished and Unfinished

As I mentioned last week, I wanted to do a book purse based on the adventures from The Hobbit.  I decided to make my own book cover because it's a bit of a shortcut... I can design the cover myself and don't have to spend the time or energy looking for the exact book at the right price.  I can't see paying more than a few bucks for a book I'm about to murder the heck out of.  I ended up getting the fabric and book for less than 10 bucks at my local Goodwill.  This project is pretty involved, so I'll be breaking this up into 2 parts.
You're going to need a lot
more beer, kiddo.

So for my bibliophiles, these posts may be slightly traumatic as they depict graphic images of a book that has been dissected for the sake of art.  I'll make the appropriate offerings to appease the Ghods...

Some day.

So... on to the book murder!


Sunday, August 24, 2014

There and Back to Nails

During some of my forays into the craftier side of the interwebs, I stumbled upon people who turn books into purses.  These things are so cool!  I love the idea of taking an old or destroyed book and giving it new life.  Instead of looking for an appropriate book, I'm taking a sorta-shortcut and making a book cover for a fictional book because, why not?

This week's inspiration is from J. R. R. Tolkien.  Bilbo Baggins writes a book called "There and Back again", about his Gandalf-fueled adventures.  I'm making my own version of his book and turning that into a purse.  
There's been a lot of problems to solve.  One of them is what kind of handles I'm putting on the book purse.  You can find some very nice purse handles for sale, but they didn't inspire me as much as I'd like.  I also had a whole bunch of pages and I didn't want to throw them away, but no idea what to do with them.  Then it hit me... glue them together and make handles from the pages of the book!  

I love the idea of having the handles relating somehow to the purse itself.  It has that artsy self-referential element that makes my outer geeky girl squee. Of course, that leaves me with the problem of how to attach them to the purse... and for that I'm recycling the hardware from a purse that's seen the end of its days.  So far, I'm hopeful that it will work, but I've never done this before, so it's all a guess.

Girly Nail Art Time

So for now, here's a simple manicure that I did recently.  It's very easy to do and pretty versatile by mixing colors.  Using black, white, silver, and gold will have a very different look from one done with pastels or neon colors.  Use what you have on hand and play with the density of dots.

If you don't have dotting tools, which are needed for this look, grab some household items.  Anything that comes to a point will work... pencils, pens, bobby pins, and toothpicks all make great dotting tools.  

I've also seen dotting tools and other nail art tools available in drugstores around here, so they're mercifully easier to find for 10 bucks or so.  If you plan on doing a lot of nail art, they're very useful to have around, especially since I use them for some sculpting jobs, too.

Sunday, August 17, 2014

Star Trek Cabochons and necklace

Those of you who've been reading this for the last several months may notice a few new changes.  Now that I've got lots of crafts up, I'm adding a page to make finding a specific project easier, in addition to what I've got on my Etsy shop.  The numbers for this blog keep going up week after week and I want to make it easier for new people and crafters to see what there is to see.

Speaking of Etsy, I'll be producing some components that you'll see on the crafts here, like the cabochons in this project.  You can purchase them here.
Thank you to everyone who has come to my site.  I hope that I can continue to inspire you all.  

Star Trekkin' across the Universe

I remember sitting down with Mom, Dad, and my brother to watch Star Trek: The Next Generation every week when I was a kid.  Mom loved the original series, so we'd gather around the tv to watch the latest episode on UPN.  The Inner Light, where Picard encounters an extinct alien civilization, is one of my all-time favorite episodes. I still cry at the end!

I love seeing the evolution of Star Trek as it responds to new concerns and values in our culture at large.  It's always been a groundbreaking show, and I hope that future incarnations, whether fan-made or Hollywood made continue that tradition.  I follow several former cast members on social media because they seem like genuinely nice, interesting and compassionate people.  I've seen every episode of the original series and TNG, a few seasons of DS9 and  Voyager, a few episodes of Enterprise (Didn't like that one), the animated series AND the web series Star Trek Continues.  I've watched documentaries about the fandom and the wonderful series hosted by Shatner called The Captains, but I don't consider myself a Trekkie or Trekker because I'm not involved in the fandom. 

I was looking at a cameo and I wanted to do a simple design that would have a lot of visual impact. I decided to do the iconic Starfleet insignia.  My original idea was to do some sort of piece glued into an ornate bezel to resemble a cameo.  I wasn't able to find any bezels that I liked, so I ended up wrapping the cabochon in wire.

Fun fact... The delta shape was originally the insignia for the Enterprise crew on TOS.  You'll see different insignias on the crews of different ships.  Lore has it that it became the Starfleet symbol after the Enterprise was the first ship to return safely from its 5-year mission.  

Aw, hell.  Maybe I am an antisocial Trekkie.  There are worse things to be!

Sunday, August 10, 2014

Dr. Who TARDIS mini Journal and necklace

I can't wait for the new Dr. Who to start up this month, it's one of my favorite television series! I'm going to miss Matt Smith, but I'm excited to see what Peter Capaldi will bring to the role.  I wanted to do a Dr. Who craft for the blog, but I wasn't quite sure what I was going to do, until I went cavorting on my one of favorite craft inspiration sites, YouTube.  I stumbled across some book making tutorials and because I'm a little nuts, I thought it'd be a lot of fun to do a miniature of River Song's TARDIS journal.

I wasn't satisfied with the tutorials I found.  The crafters did a fine job with their materials and came up with some great journals, but they didn't look like the stills from the show.  They'd glued
something, usually card stock or cardboard on the top of their existing journals, which gave very sharp edges to the journal, however the prop makers seemed to have embossed the leather instead. I wanted something that looked closer to the prop, so I went looking for a material that I'd be able to work with that wouldn't cost me a ton of money.  I had some craft foam left over from a previous project and so I decided I'd give it a shot.  I think it looks a little more like leather than some of the examples I saw.  Of course, after painting, mine's not an exact copy of the journal from the show, either, but distressed items rarely look the same.

I wanted to make a necklace after seeing some of Jill Weisman's beading tutorials on YouTube, so this was a perfect opportunity to combine them both into one very stunning necklace.

Oh, and NEWS!  I have an Etsy shop now where you can find all of my crafty goodness for sale.  Most of the items listed there will be one-of-a-kind items all inspired from the blog.  You can find the pieces at the shop tab up at the top, too.  It'll take you to Etsy to purchase.  Go check it out!  I'll be here when you return, I promise.  :)

Sunday, August 3, 2014

Cosmos Jewelry part 2: The Spaceship of the Imagination

When I saw Cosmos: A Spacetime Odyssey, I knew I wanted to sculpt the Spaceship of the Imagination.  If you haven't seen either of the series, the spaceship is a magical creation that can travel anywhere, from distant stars to subatomic particles.  In Cosmos: A Personal Voyage, the ship appears as a ball of light or we see the bridge.  This time, Ryan Church designed a beautiful, sleek oblong ship that ushers us along our journey with Tyson.

My original inspiration was an amazing steampunk choker that I picked up at SoonerCon from C.C. Guice of A Wench in the Gear.  I loved the cascade of chains from the bottom and the large focal point and the buckle closure in the back.  It's one of my favorite pieces to wear... I get compliments on it all the time!

This project hasn't gone as well as I hoped it would.  My original intention was to cast this piece, but my molds have all been consistently crappy.  It's been 15 years since I made a mold using sillicone, and despite all the YouTubing, I've been unable to get something that works using homemade soloutions.  I broke down and bought some mold putty, which will hopefully allow me to cast this in resin like I want to.  I may need to phone a friend.  (the link contains nudes and may be NSFW)

Since I wanted this project to be ready by the time I publish the blog, I tried to turn "Frusturating failure" into "happy accident".


Sunday, July 27, 2014

Cosmos Jewlery part one: Galaxy Choker

This is part one of a more intricate piece coming up next week for a piece inspired by the miniseries Cosmos: A Spacetime Odyssey.  I'm a science fangirl and was eagerly anticipating the new show, which didn't disappoint.  It was a good follow-up to the original series by Carl Sagan.  Both filled me with a sense of childlike wonder at the amazing complexity of the world and universe we find ourselves in.

It inspired me to sculpt the Spaceship of the Imagination.  I began with sculpey and a marble, but sculpey is soft enough after baking that I don't trust it as a jewelry piece.  Plastic should be much more sturdy, so this little guy is currently sitting in a homemade silicone mold that's curing.

I wanted a statement piece to go along with this and so to go along with the theme of the show.  At SoonerCon, I found and bought an amazing steampunk choker that was made from an old belt.  I thought that was a great idea and went on a shopping spree a nearby Goodwill.

Supplies

  • Skinny belt
  • Scissors
  • Acrylic paint in black, white, blue, purple, red, and yellow
  • sponge (I'm using a latex makeup sponge)
  • small (size 0) paintbrush or a toothbrush, toothbpick, or dotting tool
  • Leather Punch or awl
  • Mod Podge or other sealant
  • Chain, jump rings, and jewelry clasp (if not keeping the belt buckle)

The brand of paint you use isn't important, nor are the colors.  If you look at images from the Hubble telescope, you'll see just about every color imaginable in there.  

(yes, the images are enhanced and show details not visible to the human eye.)

Sunday, July 20, 2014

"What the hell am I going to do with this thing?"


This week's project is inspired by a visit to Dallas Makerspace where I made a heart in their blacksmithing class.  I posted it on Facebook and my aunt asked me what I was going to do with it.  Instead of this being a tutorial, this is more the process that I went through making this piece.  

What AM I going to do with this thing?

I wanted to make it into some sort of wall art, and started playing around with the idea of making something similar to a dream catcher.  I liked the rustic feel of the hammered metal and I wanted to keep with that look.  I used hemp cord, wooden beads, and cast resin keys and locks to make this piece.

Making the Heart


Dallas Makerspace is one of over 100 workshops/studios that are available to the public.  They offer classes, sometimes with a nominal fee, and members have access the fun tools and experts to make sure they are used responsibly.  It's a relatively new phenomenon, but is growing.  I'll be taking more classes there!

Most of us had never done any sort of blacksmithing before.  Our instructors helped us hammer the ends of the rod we'd been giving into points, folding the metal in half, and curving the pointed ends until we ended up with a heart.  

Some people did complex, swirly hearts.  Others, like me, did simple shapes that I tried to just make as perfect as I could.  In the end, I am really happy with my first foray into blacksmithing.  That was definitely the most fun I've ever had while getting serious burns.

Sunday, July 13, 2014

Elfquest shoes

Elfquest is the story of Cutter and his tribe of Wolfriders as they discover their world is much bigger than they ever imagined after a fire destroys the forest they call home.  This comic series, by Wendy and Richard Pini, began in 1978.  Elfquest: The Final quest began in 2012.  There are so many things I love about this series.  I love seeing male characters be strong, brave and completely in love with their mate(s), children, and friends.  I love seeing strong, intelligent female characters who don't wait for a man to save them.  I love that Cutter's daughter Ember is tough, hard-headed, and a born leader and her twin brother Suntop is gentle and tender and loved as much as his sister.

Oh, then there's the art.  Wendy's ability to tell a story with her drawings alone are wonderful.  I had so much fun wandering through the old edition and finding all of those little bits of background foreshadowing and humor.  

Elfquest was the reason I began to draw in earnest in middle school.  It was the spark, guided by my mother, that led me to create my first world with my friends, a planet named M'aarth.  Elfquest was where we drew all of our inspiration.  Amber and I did most of the drawing, though I think just about everyone tried their hand at emulating Wendy Pini's style.  I found some very dear friends because of that world, people who will always have a very special place in my heart.

I found a tutorial on YouTube on how to a decoupage comic book shoe, which inspired me to do an Elfquest-inspired one. This is one of my favorite projects to date and I've gotten several compliments on them.  

Sunday, July 6, 2014

Metallic Lace Manicure Tutorial

I'm in the middle of working on a pair of decoupage shoes using images from one of my favorite comics when I was a child.  Since they're not done yet, it's nail art time!

This was the manicure that I had for SoonerCon, so since I was doing the steampunk thing, I thought I'd go with a nice metallic nail and I'm a sucker for "complicated" nail designs.

This one is a pretty easy one once it's broken down step-by-step.  It looks best with contrast between the colors.  You could do a contrast with light and dark, or even actual contrasting colors on the color wheel.  If you're not familiar with the color wheel or color theory, it's a very useful tool for helping to pick out colors for many arts and crafts.  

This technique isn't mine.  I can't remember where I ran across it the first time as it was several months ago. It's a variation on the no-tools cloud manicure, which is also an adorable look without all the extra dots.

However, dots make your nail art look much more complicated than it actually is.  

Tools 

  • Base coat
  • Nail polish colors:  Shown here is Pure Ice in "Silver Mercedes", "Magic", and "Bite Me" and Maybelline Color Show in "Bold Gold"
  • Dotting tool: I used both a large and small diameter dotting tool.  If you don't have this particular tool, a toothpick will make the small dots and an old ballpoint pen will do for the larger dots.
  • Palette
  • Top coat

Monday, June 30, 2014

SoonerCon report

SoonerCon is over and I've done the Nap of the Chronically Fatigued.  Costume Contests were entered, dancing was done, and sales were made at Mom's table.  All in all, it was a lot of fun and I'll be doing more cons and contests in the general area.  I made new friends and got way too many ideas.  It's hit my "creativity reset" button and I'm ready to get a-crackin' on more cool projects.

Mom has been going to SF/Fantasy cons since before I was born when she got into Star Trek fandom in the 70's.  She started taking me along to local cons when I was a child where I'd help out at the table.  She sold comics and graphic novels and over the years has moved into nonfiction books, short stories, and lately, science.  I stopped going in my 20's when life stopped for a while while I dealt with the aftermath of abusive relationships, endometriosis and a hysterectomy, a fibromyalgia diagnosis, and the devastating depression that came afterwards.

None of this stopped Mom from offering me invitations whenever there was a local convention.  She'd never push, just put the invitation out there and hope I'd be there.  If I went, she'd always gush about how happy she was that I was there and how much fun she had hanging out with me at cons.  It was a point of light in a dark time in my life and a much-needed reminder that I was special and worthwhile, if only to her.

I won the lottery in the Mom department.  Dad's also awesome, and I am one lucky kid to have them.

Saturday, June 21, 2014

Kitsune Preview!


SoonerCon is at the end of this month, and I've been working since February to get this costume together from thrifted and crafted pieces.  This is the first time I've created a character and costume from scratch from a crazy idea that I wanted to make a realistic fox tail out of yarn.

Yep, I'm a masochist.

I think it's turned out beautifully.  I will definitely participate in the costume contest, but I don't think it's worthy of winning any awards. I've never participated in the Masquerade at any con I've been to and I'm not quite sure what to expect.  It should be an adventure and getting me out of my comfort zone is always a good thing.  I'm not sure if I'll have to have a performance or not, so I'm preparing one just in case.

Tuesday, June 10, 2014

Corset Inspired belt

"I swear, I'm sotally tober, Ocisfer."

I've always wanted to make my own clothes. I have Project Runway fantasies and a reality that looks like a PSA against drinking and sewing. Just ONCE I'd like to be able to cut a straight line. Maybe it's because I use scissors right-handed and I'm a leftie. Maybe it's the astigmatism. Maybe it's none of this and people who can cut straight lines are robots.

I took an apparel class in high school and did a dress as a class project. I hated mine by the end of the only day I wore it. I made one skirt on my own and it was equally terrible.  Both pieces ended up in the back of my closet to fester and die. I wish my instructor would have taken the time to have us all get the proper size based on our measurements. Instead, we went with the clothing size we thought (or wished) we were and I don't think anyone in the class came up with an attractive dress. If you've never sewn from a pattern, your off-the-rack size and pattern size aren't the same, as if vanity sizing wasn't confusing enough. I wear a 16-22 depending on the clothing manufacturer and I'm around a 24W in sewing pattern sizes. It's a blow to the ego at first, but fit is more important than a number on a tag.


Ben bought me a Brother sewing machine for Christmas in 2013 after he'd asked for some alteration to his clothes and I'd give him the same response: "Sure, if I had a sewing machine."  Ben took this to heart and got this amazing gift for me and I was so excited! I could finally do the tailoring to my clothes that I always wanted but could never seem to part with the money. Now for the fun part: learning how to use the dag-blasted machine which I have just named Mano. Why Mano? Because it's Spanish for "hand" and slang for "brother" and I'm a dorky Texan.


Tuesday, June 3, 2014

Butterfly manicure and Corset Belt intro

I saw the butterfly manicure online a while back and think it's beautiful. I'm not much of a butterfly person, but the butterfly is associated with fibromyalgia awareness, so a couple of weeks ago I was inspired to do a Fibro Awareness manicure.  I was diagnosed back in 2004 after a long and painful illness that led to a hysterectomy at 24.  It's cost me jobs, relationships, and opportunities.  Eventually, I've to come to terms with this disease and while it's a struggle, I'm determined to live the best life I can.  I'm with a wonderful man and a job that I love that has seen for the last 5 years the ups and "I am in so much pain I can't think" moments.  I'm grateful to the people in my life who have helped me through the depression that lasted through my twenties.  I'm glad that now they finally see me emerging from my own cocoon to become the woman that was inside all the time.


Done, right?  Nope.
I didn't document the steps that time because it was the first time I'd done that manicure.  I did the nails again because i liked them so much!  I still haven't stopped my crafting, though... I've got a deadline.  This next major project is a corset belt, which I'm still finishing up all the tiny little details.  One problem: I'm an noobie seamstress.

I wanted to do a hall costume this time around because I've never done it and I love having really cool, unique costumes.  This time, I'm doing a Steampunk Kitsune after finding a yarn tail tutorial on YouTube and getting inspired.  I had some of the elements already and it's now just adding all of the little details, like a corset.  I don't have the skills yet to be able to make one that isn't terrible, so I went online and found an easy corset-inspired belt that would be a successful enough project.  I've had lots of little bumps in the process of learning and although it's far from perfect, I don't hate it.  The sewing didn't take long, but now it's just adding all of the details that is taking a while.  You'll see the completed journey next week when I can show off both sides of this beast... it's reversible! (More costume, no extra room needed in suitcase FTW)


Now.. on to the girly-girl painting of the nails!!  This is not a manicure for the faint of heart, as it does involve drawing with your non-dominant hand (shudder), but it's easier if you've got something like Sally Hansen's Nail Art Pen or even a sharpie.  I did not create this manicure, and you'll see several different versions of this tutorial online.  You'll see this theme again come November for Transgender Awareness week.


Tuesday, May 27, 2014

Acrylic fangs

I hate Halloween store fangs. My inner Goth girl goes nuts for them and I try not to fondle them in the store too much. My outer perfectionist can't stand that they never fit right. Most are way too long for my small mouth. If I get them positioned where the top of the tooth meets the gum line, I can't close my mouth. If I can close my mouth, the fangs go way too far over my gumline and look clearly fake. The color doesn't match my teeth either and I always end up with high hopes and sad, sad realities.

I've always had dreams of having a set of custom fangs. As much as I'd like to, I can't afford to have them made for me, but I do know my way around a sculpting project. After some clever YouTube- and Google-fu, I found some instructions that seemed simple enough... make mold of teeth, sculpt teeth on positive mold and go! I've got experience sculpting, so this should be easy-peasy, right?

Nope.

The steps themselves are simple enough. It's the making realistic-looking teeth that are a good size for me that took some trial and error. I also had trouble with my materials interacting in undesirable ways. Turns out plastic loves to stick to plastic. (I knew this.) This project, which I thought I could bang out in an afternoon, ended up taking me 2 days. I ended up with 2 pairs of fangs that I was pretty happy with in the end and about 3 additional pairs that I broke. Easy. 

Yeeeah.

I spent around $30.00 (US) for the entire project, but already some of the materials lying around. Mine fit decently well without some sort of adhesive, but they're a little loose. This could be because of the petroleum jelly I was using to keep the acrylic from destroying my mold again. I've got enough of the stuff to make several molds and teeth, so my cost-per-product is much cheaper.

Skill level: Intermediate- advanced. Experience with sculpting will be very useful.  

If you're not experienced, don't worry. I'm happy to answer any questions you have.

Tuesday, May 20, 2014

Steampunk Mini Top Hat Tutorial


I love the steampunk aesthetic of layered leather, lace, and metal. I am also developing an unhealthy obsession with mini hats and fascinators, even though I rarely wear them because I don't often have an excuse to get that dolled up.  I think they're all amazing works of art.  Crafty bonus: they're pretty easy!. I learned how to make them from Bev Hale over at Otherwhen Oddities at Octopodicon in 2013. Bev's class used an 8 oz plastic cup and felt to make the hats, but here I'm using craft foam because it's what I happen to have at hand. If you don't happen to have all of these materials, get creative with what you have around. All of the dimensions for this project are directly proportional to the craft foam size I had, which was 5.5"x8". You can scale up or down as you need to.
 
You'll notice that I did not glue a single gear on it. Gears are totally steampunk, but steampunk is not always gears.


Difficulty: Beginner. This project will take 1-4 hours depending on drying times and how much stuff you put on the hat.

Thursday, May 15, 2014

Wire Elf Ears Tutorial

This unique ear cuff (no piercing required) looks like a pointed ear when worn.  There is a wire in the back that goes around the back of your ear, similar to how glasses fit your head.  


I am focusing more on the general technique of how to make them than how to make this specific pair.  Feel free to riff on my instructions here to make pieces for your own personal use or to sell.

You can create your own template by tracing your ear and then drawing your template on paper before "tracing" it with the wire. If you want two perfectly symmetrical ears, you'll need to design it on paper first. After you have your basic ear template, draw your desired shape so that you can use it as your guide. Don't forget the curls (or some other design) at the wire ends or the wire will scratch your face and behind your ear.  

I personally like a more organic approach and enjoy making "siblings" rather than "twins".  Neither approach is better than the other, it's a matter of taste.


Skill level: Advanced beginner-intermediate. Project will take 1-6 hours, depending on your comfort level with making wire jewelry and the complexity of your final cuff. Measurements do not need to be exact for this project.  This set took me about 4 hours from start to finish, including designing the interior elements.